Infantry Magnets
by Cat Reddington-Wilde
December 14, 2018

What is the most useful way to mount Ogre infantry miniatures on their bases to easily allow for casualty removal and transfer between bases and personnel carriers? Magnets.
The plastic infantry that come with the Ogre Miniatures sets have a very practical basing system with plastic tabs and slots that allows the figures to be snapped in and out of both their bases and the GEV-PCs. They are well designed for quick and easy use right out of the box. Studying my figures when they first arrived, though, I began to wonder if there might be a better way. Meditating on the tab mechanics led to the conclusion that this arrangement could be improved with a little work and a lot of magnets. Initial experiments proved successful, so I ordered supplies online in bulk.

Needed ingredients are: 1/8" x OD 3/4" zinc plated fender washers, 1mm x OD 2mm rare earth magnets, and custom base toppers to fit the washers. I sent a sample of a washer, a plastic base, and an infantry figure to my friendly local laser cutting company, Things From The Basement, LLC. They designed and cut the chipboard toppers with holes that keep the miniatures properly spaced and aligned facing the same direction. Some assembly is required.
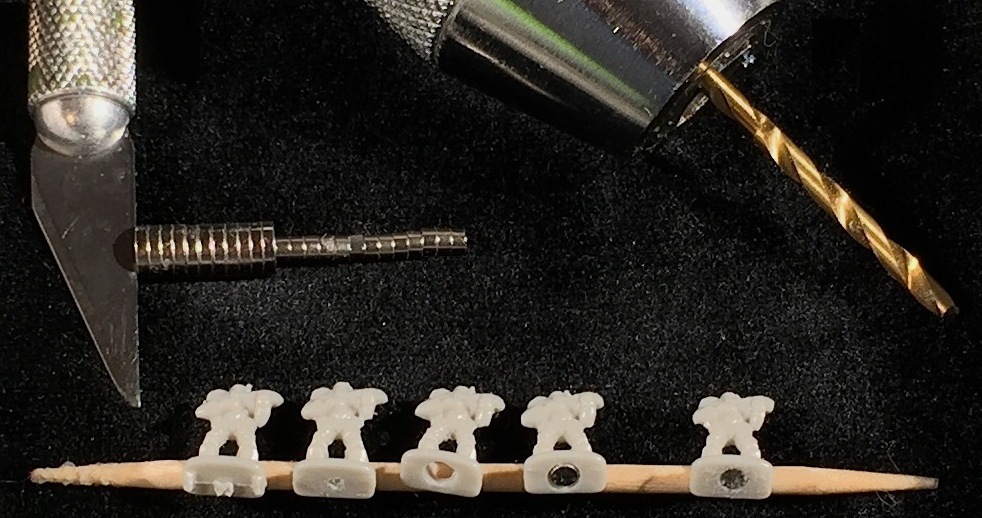
Prepare the infantry by removing the plastic tabs from the bottom of each base. They come off easily with sprue snips. Shave off the remaining stubs with a hobby knife, leaving a flat surface. Mark a drilling spot in the center of the figure's base with the tip of the knife. Drill a hole with a 2mm bit in a pin vise. Check for magnet fit in the hole, reaming lightly with the knife if more clearance is needed.

When gluing the magnets in, it is important to triple check that every one is inserted with the same polarity alignment. Any figures with opposite alignments may want to leap out of their assigned spaces and stick to each other. I work with a small stack of the 2mm magnets that have another stack of larger magnets stuck at one end. The larger magnets act as a handle and make sure that the 2mm magnets always have the same facing pointing towards the hole.
Any glue for metals will work; I prefer Zap-A-Gap CA glue. A toothpick is a useful non-magnetic tool to press on the inserted magnet to get it flat and level with the bottom of the base. Sometimes a magnet might spin around before the glue sets, so always check each one after it is in place. Remove any wayward magnets (pressing hard with the blunt tip of a file or tweezers usually does the trick) and re-glue in the proper direction. To be double-sure that the magnet stays in place over continued use, smoosh a little bit of putty into any gaps around the edges, then top with a thin layer of glue to harden the putty. Testor's Contour Putty is inexpensive, easy to use with no mixing involved, and good for jobs like this.

Repeat the process for each figure. Repeat it a lot. It is a simple procedure, but with Kickstarter quantities of infantry, it is a time-consuming chore. Watch a pile of monster movies while working on this project. My initial math was wrong. Doing a few magnets doesn't take much time, but a lot of magnets adds up to a lot of time.
I spray painted the bases in matching colors for each force. I sub-divided each of the blue, green, and red forces into light and dark battlegroups to facilitate identification in large multi-player games. The bottoms of the bases are painted in a solid color to speed up sorting and packing everything in the correct boxes at the end of a game. The tops are sprayed with a variety of colors to achieve a speckled effect. Finally, they are spray varnished for protection. Base toppers like these would also work for making extra infantry bases even if you are just gluing figures to the base and don't want to spend time filling texture around the tiny base of each figure to blend them in.

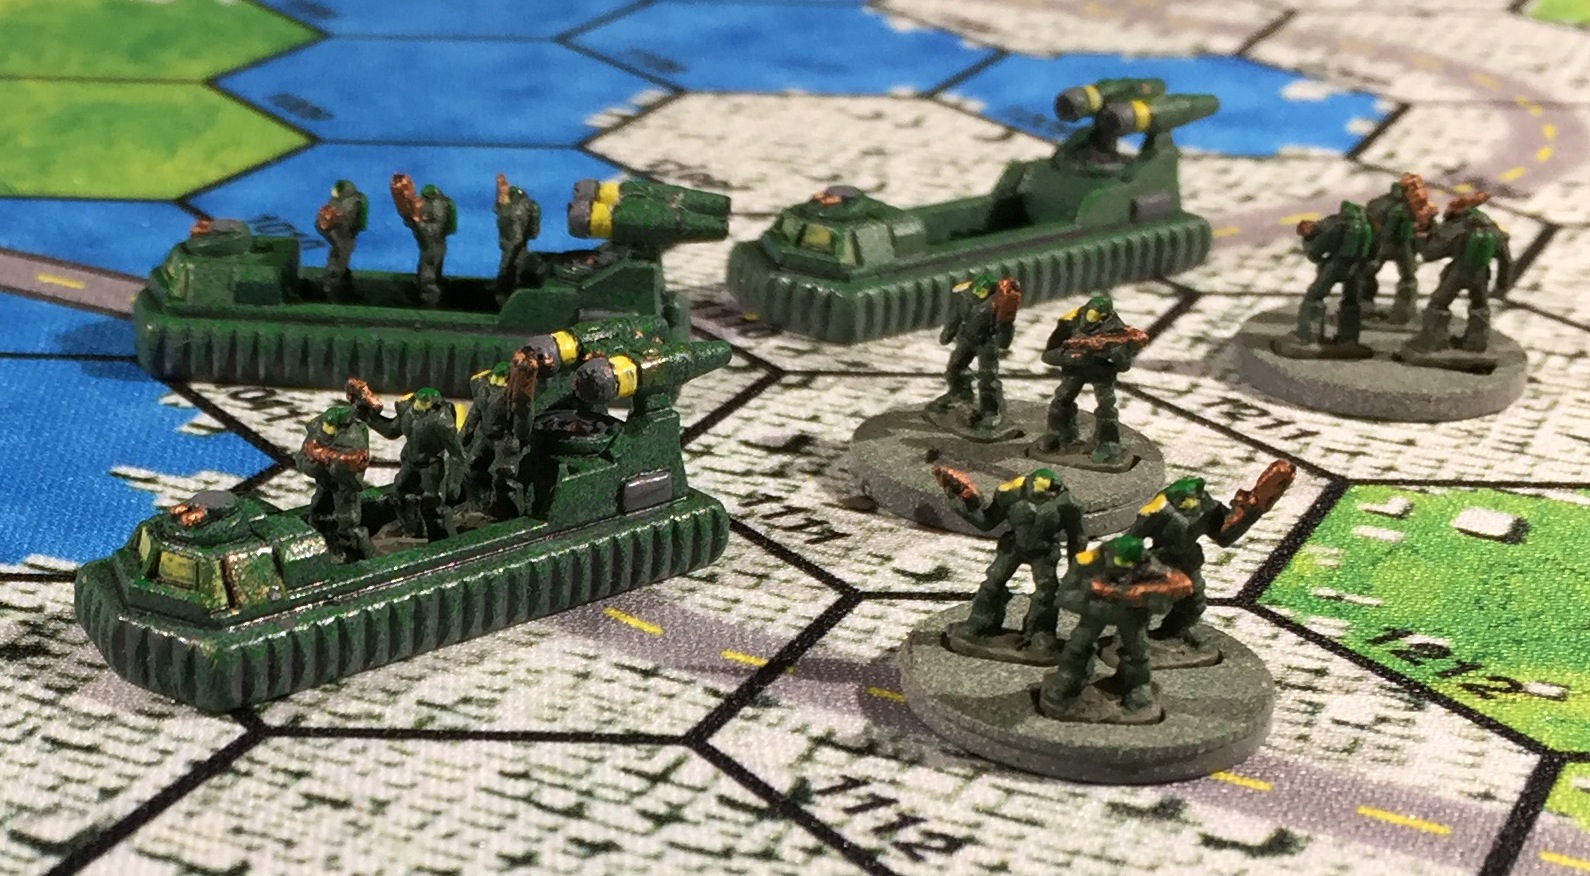
GEV-PCs need a metal floor to transport the bemagnetted infantry. Remove the plastic floor with sprue snips and knife. The snips quickly achieve the initial chopping. Trim and finish the edges with knife and hobby file. I carved out the whole mid-level area of the passenger well, cutting right up to the ends of the indented space as can be seen in the photographs. This extra length will accommodate alternate figures that might require a little more space. Glue a magnetic metal floor onto the underside of the vehicle. A number of small companies make metal bases for wargaming miniatures. I ordered custom cut 11/32" x 3/4" bases from Shogun Miniatures to use for the floors.
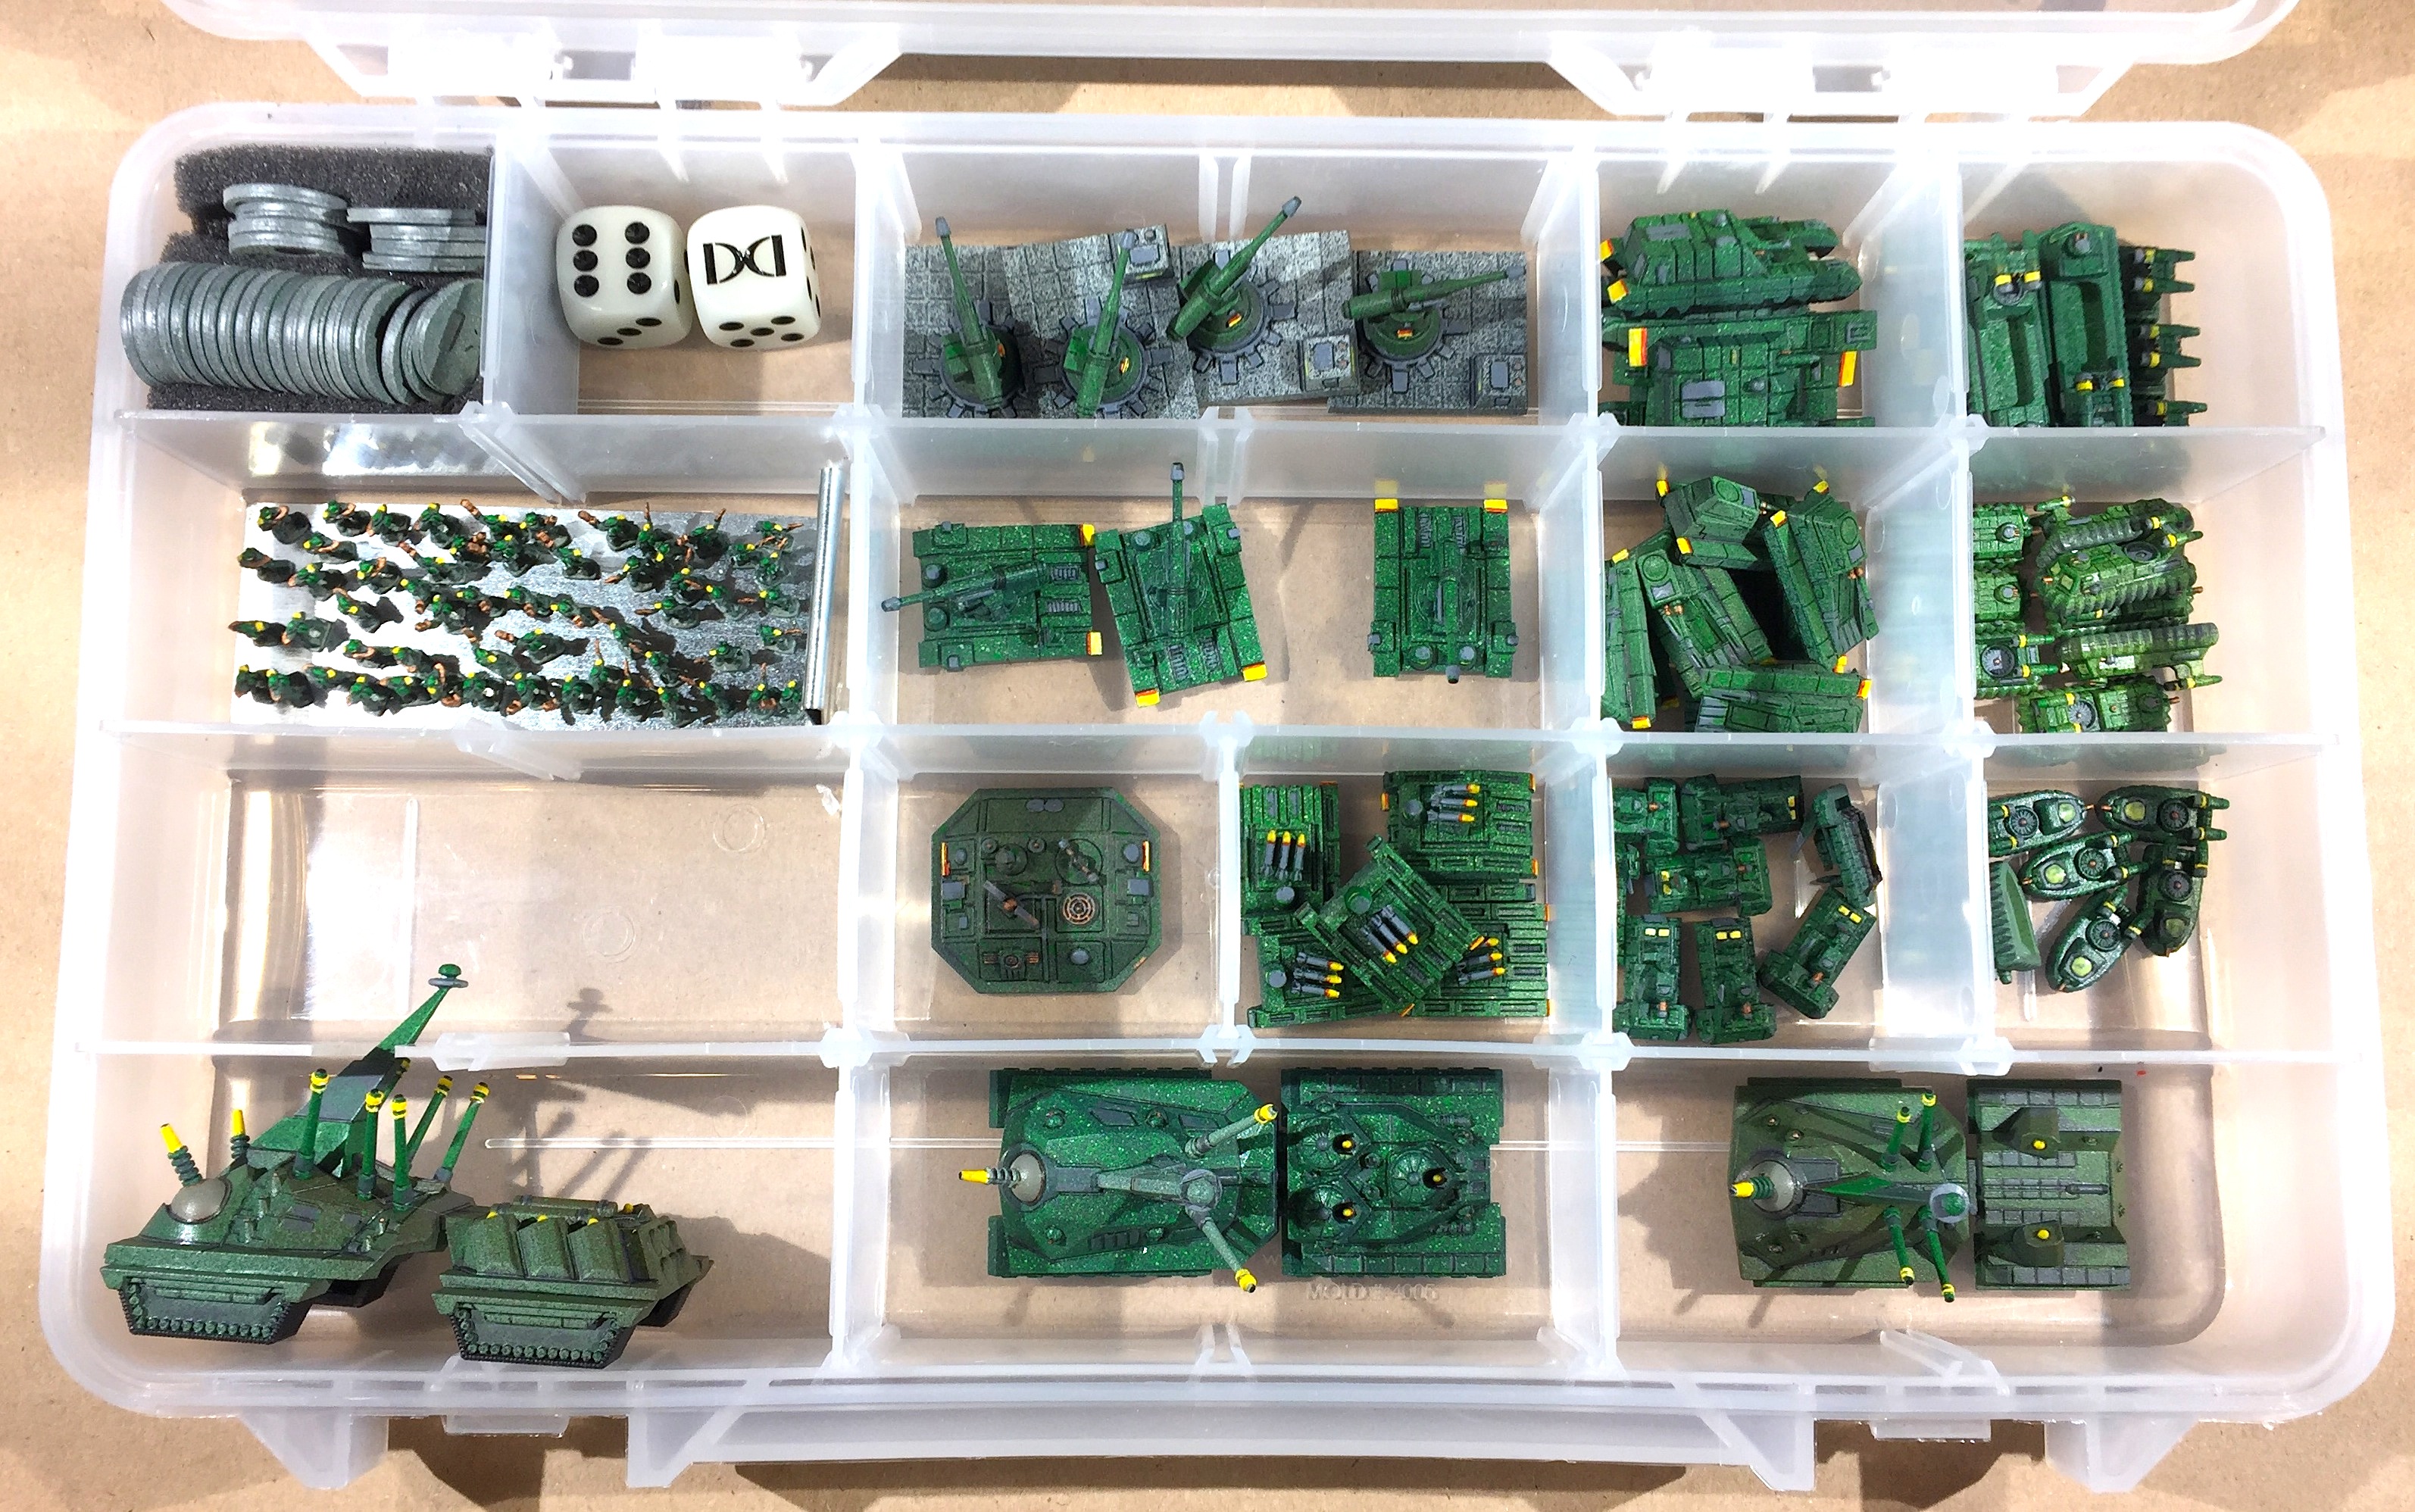
To be able to store and transport the infantry in a Plano box with the rest of their force, I made caddies from 28 gauge galvanized steel. The figures could be stored in common mint tins, but those don't easily fit inside the larger storage box. I picked up a small sheet of steel at the big box hardware store and cut 6" x 1.5" strips on a band saw, filed the edges smooth, and bent them to shape by hand over a hard corner surface. I used the edge of my anvil because I have one, but really any workbench table edge will do. After doubling over the handle, the final step was to squeeze the fold tight using a bench vise. The resulting caddy has a 4" long floor and fits in a double slot in the box.

All of my plastic miniatures have a base coat of Krylon spray paint and a final spray varnish of Testor's Dullcote on top. Krylon on plastic is nearly indestructible and will not chip. The varnish on top ensures that other detail painting won't rub off. With this combination of protection, it is quite safe to store and transport the models loosely packed in the storage box as shown.
A big advantage of the magnet system is its flexibility beyond the plastic Ogre miniatures. Other additional figure styles can be used for specialist troops, such as Marines and Heavy Weapons Teams. Once equipped with a magnet, any figure can be swapped in and out of the bases and vehicles. Once equipped with a magnetic floor, any truck or hovertruck can be added to the motor pool. Additional infantry and transport vehicles won't be limited to those with plastic tabs and slots.

Most importantly, the system has worked very well during play. We have a group of friends that get together regularly to play Ogre, and everyone has been very happy with how smoothly the magnets work for loading and unloading infantry from GEV-PCs, and for the dread casualty removal. The work put into this project will amortize very well over time and continued game play!
The Ogrezine II PDF, combining all of these articles with additional new material, will be available on Warehouse 23.


